C5 Corvette · Protection & safety
Element E50 seat-rail installation
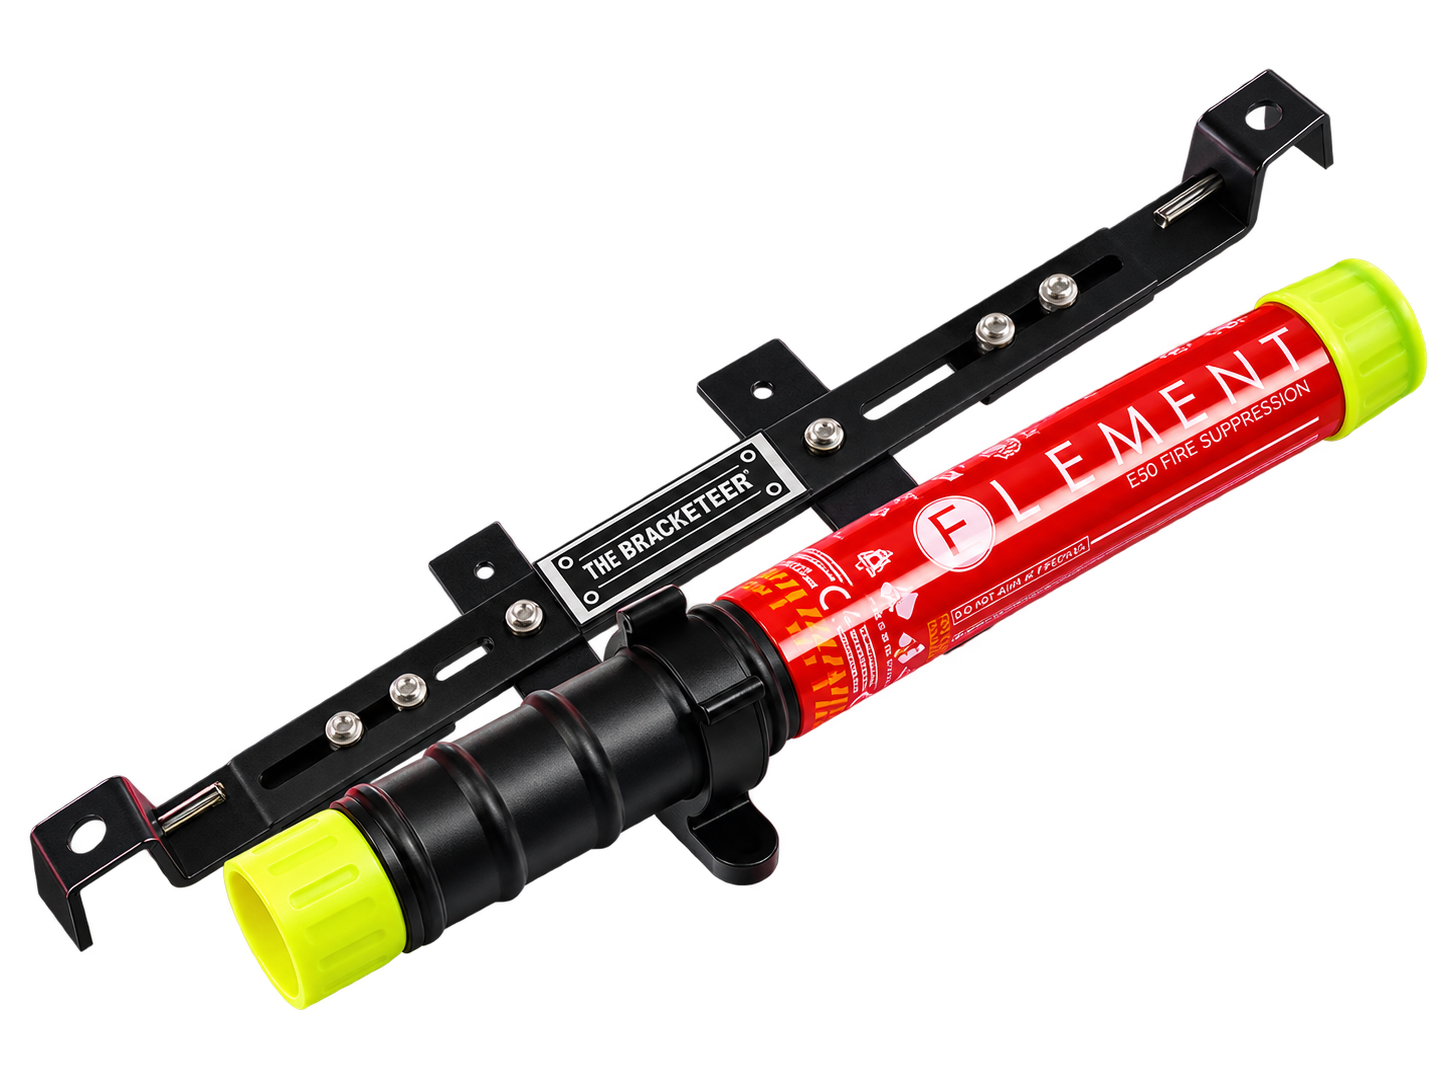
A compact safety upgrade on a 2001 Corvette Z06 that required a second installation. Mounting The Bracketeer at the front seat bolts kept the red Lloyd mat from lying flat and would have required trimming the plastic bolt covers. Moving the assembly to both passenger-seat rails tucked it closer to the seat and solved every clearance problem without cutting anything.
The problem
I first used the front seat bolts. The red Lloyd mat would not lie flat, and reinstalling the plastic bolt covers would have meant trimming them around the bracket.
The fix
Because The Bracketeer adjusts for either mounting method, I moved its tabs onto both passenger-seat rails and tucked the E50 closer to the seat.
The result
The mat now lies flat, the bolt covers remain intact and the extinguisher stays out of the passenger area. Nothing had to be trimmed.
The parts I purchased
Extinguisher and mounting hardware
Element E50 Fire Extinguisher
$89.95The compact, residue-free extinguisher selected for Robin.
Shop this productThe Bracketeer Universal Seat-Rail Bracket
$64.99Adjustable steel bracket used to position the extinguisher at the passenger seat rails.
Shop this productReference prices checked September 17, 2026; retailer prices and availability can change. Legal & Disclosures
Important equipment tip
Why I chose the Element E50 for the Corvette
I chose the Element E50 because its solid-state aerosol discharge leaves effectively no cleanup residue, is non-corrosive and does not rely on a pressurized cylinder. That matters in a C5 engine bay packed with wiring, sensors and electronics, where conventional dry-chemical powder can turn a contained fire into a long and potentially damaging cleanup.
The E50 provides a 50-second discharge from a unit weighing roughly half a pound. Its zero-pressure output is designed not to spread burning oil or fuel, and Element rates it for vehicle storage from −58°F to 176°F, an important consideration inside a black Corvette living in Florida heat.
Safety note: Always match the extinguisher's listed fire classifications to the hazards in the vehicle and follow its operating instructions. “Engine-safe” refers to avoiding damaging powder residue, not a guarantee that a fire or discharge can never harm components.
Element E50 specifications
- Discharge time
- 50 seconds
- Dimensions
- 10.75 in × 1.2 in diameter
- Weight
- 0.5 lb / 230 g
- Operating range
- −58°F to 176°F
- System
- Solid-state, zero-pressure discharge
- Maintenance
- No compressed gas, moving parts or scheduled service
Tools & sizes
What to have beside the car
Included Allen keys
For the supplied M5 and M6 bracket hardware
Blue threadlocker
Medium-strength; specified by Bracketeer for the mounting hardware
Ratchet and seat-fastener socket
Only if mounting through the factory seat bolts rather than clamping to the rails; verify the C5 fastener before removal
Tape measure or steel rule
For centering the bracket and confirming clearance
Small flashlight
For checking the rail lip, carpet and console-side clearance
Flush cutters
For trimming the thin breakaway tie cleanly
The Bracketeer supplies two Allen keys for its M5 and M6 hardware. Because bracket orientation and supplied fasteners can vary, verify the actual wrench/socket fit before starting rather than forcing a nominal size.
The work
How it came together
- 1
Mount the bracket at the front seat bolts and discover that the Lloyd mat will not lie flat and the plastic bolt covers would require trimming
- 2
Use The Bracketeer's adjustable tabs to relocate the crossbar from the seat bolts to both passenger-seat rails
- 3
Tuck the assembly closer to the front of the seat, then verify that the mat, bolt covers and passenger footwell all remain clear
- 4
Stabilize the unsupported side with a thin breakaway tie that can be defeated quickly in an emergency
- 5
Load-check the mount and confirm the final compromise: the passenger-seat position is now fixed
Installation story
Before, during and after
These instructional reconstructions follow the actual clearance problem and the final seat-rail solution. Select any frame for a closer look.
From the community
Comments about this project
Questions, corrections and firsthand C5 experience connected specifically to this build.